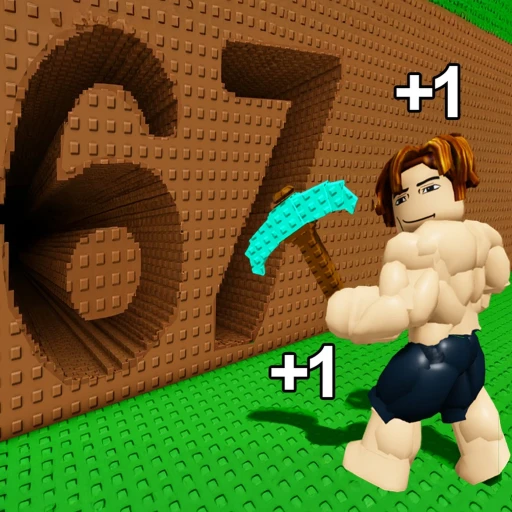
+1 Dig Per Step Free Robux Guide (2026) — Codes, Tips & Progression
+1 Dig Per Step is one of those Roblox games that hooks you with a dead-simple premise and then quietly eats three hours of your afternoon. Every step your character takes digs one block deeper into the ground. That's it. That's the entire pitch. But layered on top of that one mechanic are pickaxe upgrades, muscle training, a rebirth system with permanent multipliers, and a surprisingly deep progression curve that's pulled in over 3.3 million visits since launch. The game currently sits at an 87% approval rating, and the player count keeps climbing as word spreads through Roblox's recommendation algorithm.
This guide covers everything you need to dominate +1 Dig Per Step in May 2026: optimal upgrade paths, how rebirthing actually works under the hood, every active code, and practical strategies for reaching the bottom faster than 95% of the lobby. We'll also briefly touch on how some players use Earnaldo to pick up free Robux for game passes, but this guide is overwhelmingly about the game itself and how to play it well.
Table of Contents
1. What Is +1 Dig Per Step?
+1 Dig Per Step belongs to the incremental/idle simulator genre on Roblox, a category that includes games like Muscle Legends and various "per click" experiences. The core idea is elegantly minimal: your character stands on a patch of dirt, and every time you move forward, you dig one block deeper. Walk 100 steps, you're 100 blocks down. Walk 1,000 steps, you're deep enough to start seeing rare ore layers and gem deposits.
But nobody stays at 1 block per step for long. The entire progression system revolves around increasing that number. A fully upgraded character with a maxed pickaxe, trained muscles, and several rebirths under their belt can dig 50, 100, or even 200+ blocks per single step. That exponential scaling is what makes the game addictive — you're constantly chasing the next multiplier that turns a slow grind into a satisfying avalanche of depth.
Here's a quick snapshot of where +1 Dig Per Step stands right now:
| Stat | Value |
|---|---|
| Total visits | 3.3 million+ |
| Player rating | ~87% positive |
| Genre | Incremental / Idle Simulator |
| Pickaxe tiers | 8 (Wooden through Diamond) |
| Rebirth levels | 10+ (with escalating multipliers) |
| Muscle training stages | 100 strength levels |
| Depth zones | 5 biomes (Dirt, Stone, Iron, Crystal, Core) |
The game is entirely free to play. You can reach the bottom, unlock the Diamond Pickaxe, rebirth multiple times, and max out your muscles without spending a single Robux. Optional game passes exist for convenience — things like auto-walk and 2x dig speed — but they don't gate any content. You can play +1 Dig Per Step here: +1 Dig Per Step on Roblox.

2. Core Mechanics — Digging, Pickaxes, Muscles & Rebirth
+1 Dig Per Step has four interconnected systems that feed into each other. Understanding how they interact is the difference between a player who reaches the bottom in 45 minutes and one who's still stuck in the Stone layer after two hours. Let's break down each one.
Digging — The Foundation of Everything
Walking is digging. Every step moves your character forward and removes blocks beneath you. At the start, you dig exactly 1 block per step, which is painfully slow. The dig zone is divided into five biomes stacked vertically:
- Dirt Layer (Depth 0–100): Soft ground, fast digging even at base stats. Coins drop every 5–10 blocks. This layer exists purely as a tutorial zone — you'll blast through it in under two minutes once you have any upgrades at all.
- Stone Layer (Depth 100–300): Harder material that doesn't slow you down mechanically but contains better coin drops. You'll see your first gem deposits here, typically around depth 180–220.
- Iron Layer (Depth 300–600): The mid-game. Coin drops increase significantly, and rare ore veins appear that give burst rewards of 500–1,000 coins when you dig through them. This is where most new players hit their first progression wall.
- Crystal Layer (Depth 600–900): Gem deposits become common here, dropping 2–5 gems per vein. The visual design shifts to purple and blue crystal formations. Reaching this layer on your first run typically requires at least a Tier 4 pickaxe and 30+ muscle strength.
- Core Layer (Depth 900–Bottom): The final stretch. Lava particles, glowing ore, and massive coin drops. The bottom shifts between depth 1,000 and 1,200 depending on the server instance. Reaching it earns you a win.
Each biome drops progressively more coins, which feeds into the upgrade loop. Dirt blocks might drop 1–3 coins each, while Core blocks can drop 50–100. That scaling means deeper runs are exponentially more profitable than shallow ones, which creates a natural incentive to push your dig rate as high as possible before starting a fresh run.
Pickaxe Upgrades — Your Primary Multiplier
The pickaxe shop is the first upgrade menu you'll encounter, and it's the most impactful early-game investment. There are 8 pickaxe tiers, each providing a flat bonus to blocks dug per step:
| Tier | Pickaxe | Cost | Dig Bonus | Unlock Requirement |
|---|---|---|---|---|
| 1 | Wooden Pickaxe | Free (starter) | +0 (base 1) | None |
| 2 | Stone Pickaxe | 200 coins | +1 (total 2) | None |
| 3 | Iron Pickaxe | 800 coins | +2 (total 3) | 1 win |
| 4 | Steel Pickaxe | 2,500 coins | +4 (total 5) | 3 wins |
| 5 | Gold Pickaxe | 8,000 coins | +7 (total 8) | 5 wins |
| 6 | Platinum Pickaxe | 25,000 coins | +12 (total 13) | 10 wins |
| 7 | Obsidian Pickaxe | 75,000 coins | +20 (total 21) | 15 wins |
| 8 | Diamond Pickaxe | 200,000 coins | +35 (total 36) | 25 wins |
The jump from Tier 1 to Tier 2 doubles your dig speed for just 200 coins — that's the single most efficient purchase in the entire game. You should buy the Stone Pickaxe within your first 3–4 minutes of playing, usually after a single dig run through the Dirt layer. From there, the cost curve steepens, but each tier remains worth the investment because it compounds with muscle training and rebirth multipliers.
Note the win requirements starting at Tier 3. You can't just farm coins and skip ahead to the Diamond Pickaxe. You need 25 wins (25 completed runs to the bottom) to even unlock the purchase option. This forces players to engage with the rebirth system, since grinding 25 wins at base stats would take an absurdly long time.
Muscle Training — The Steady Grind
The gym area sits off to the side of the main dig zone. Walking into it opens a training interface where you can spend coins to increase your character's strength level. Each strength level adds a flat +0.5 blocks per step to your dig rate, and there are 100 strength levels total — meaning a fully trained character gets +50 blocks per step just from muscles alone.
Training costs start low (50 coins for Level 1) and scale up to 10,000 coins per level for the final tiers. The total cost to max out all 100 strength levels is approximately 185,000 coins. That sounds steep, but remember that deeper runs drop significantly more coins. A single Core-layer run with a Tier 5+ pickaxe can net 15,000–25,000 coins, so a mid-game player can buy 5–8 muscle levels per run.
Here's why muscle training matters so much: it stacks additively with your pickaxe bonus but multiplicatively with rebirth multipliers. If you have a Gold Pickaxe (+7) and 40 muscle levels (+20), your base dig rate is 28 blocks per step. After one rebirth (2x multiplier), that becomes 56. After two rebirths (3x), it's 84. Every point of muscle strength you train gets amplified by your rebirth level, so training early and often is always the right call.
Rebirth — The Prestige System That Changes Everything
Rebirthing is the prestige mechanic that separates casual players from serious diggers. When you rebirth, you lose your current depth, your pickaxe reverts to Wooden, and your muscle levels reset to zero. In exchange, you gain a permanent multiplier that applies to all future digging.
The multiplier structure works like this:
| Rebirth # | Multiplier | Requirement | Effective Dig Boost |
|---|---|---|---|
| 1st | 2x | Reach depth 500 | Double all digging |
| 2nd | 3x | Reach depth 750 | Triple all digging |
| 3rd | 5x | Reach depth 1,000 | 5x all digging |
| 4th | 8x | 2 wins post-rebirth 3 | 8x all digging |
| 5th | 12x | 5 wins post-rebirth 4 | 12x all digging |
The depth requirement for the first rebirth (500) is deliberately achievable on a first playthrough. Most players hit depth 500 within 30–45 minutes of active walking, even with minimal upgrades. That first rebirth is transformative: suddenly your Wooden Pickaxe digs 2 blocks per step instead of 1, and every coin you earn is worth twice as much because you're progressing twice as fast.
Later rebirths require wins rather than just depth, which means you need to reach the bottom multiple times. This creates an interesting decision loop: should you rebirth now for a small multiplier boost, or grind a few more wins to unlock a better pickaxe tier first? Generally, you should rebirth as soon as you meet the requirement. The multiplier improvement accelerates everything else, including future win grinds.
Players who've hit Rebirth 5 (12x multiplier) with a Diamond Pickaxe and maxed muscles are digging at roughly 1,032 blocks per step. At that point, reaching the bottom takes maybe 2–3 minutes of casual walking. The game shifts from a grind into a satisfying idle loop where you rack up wins almost passively.

3. Progression Tips — How to Dig Faster Than Everyone Else
Understanding the mechanics is one thing. Executing an optimized progression path is another. These strategies are based on what top leaderboard players actually do, not just what the game's tutorial suggests.
Your First 15 Minutes Should Look Like This
- Walk forward immediately. Don't explore the lobby or check the shop — just start digging. Your first 100 blocks of depth will drop roughly 150–200 coins.
- At depth 100, teleport back to the surface using the button in the top-left corner. Buy the Stone Pickaxe (200 coins) from the shop.
- Start your second run. With the Stone Pickaxe, you're digging 2 blocks per step, so you'll hit depth 200 in the same time it took to reach 100 before. Collect roughly 400–500 coins.
- Teleport back. Spend 250 coins on your first 5 muscle training levels (+2.5 blocks per step). Save the rest toward the Iron Pickaxe (800 coins, requires 1 win).
- On your third run, push as deep as you can. With 4.5 blocks per step, you should reach depth 400–500 comfortably. If you hit 500, rebirth immediately.
If you follow this exact sequence, you'll have your first rebirth within 12–15 minutes. Most new players take 30–45 minutes because they either waste time exploring the lobby or dump all their coins into muscle training without upgrading their pickaxe first.
The Post-Rebirth Power Spike
After your first rebirth, everything resets except your 2x multiplier. Here's the key insight most players miss: your coin drops also benefit from the rebirth multiplier because you're reaching deeper (higher-value) layers faster. A Dirt block that dropped 2 coins before now effectively drops 2 coins but you're passing through twice as many blocks per step, so your coins-per-minute roughly doubles from the depth progression alone.
Your post-rebirth priorities should be:
- Buy the Stone Pickaxe again (200 coins — takes about 90 seconds of walking).
- Train 10 muscle levels (roughly 300 coins total).
- Push straight to the bottom on your first real run. With 2x multiplier, Stone Pickaxe, and 10 muscles, you're digging at roughly 12 blocks per step. The bottom is within reach in 8–10 minutes.
- Earn your first win. Use the coin payout to buy the Iron Pickaxe (need 1 win to unlock, 800 coins to purchase).
- Grind 2 more wins to unlock the Steel Pickaxe. By this point, each run takes 5–7 minutes.
When to Rebirth vs. When to Grind Wins
This is the most common question in the +1 Dig Per Step community, and the answer depends on your current multiplier. The rule of thumb: rebirth whenever the next multiplier is at least 1.5x your current one. Going from 2x to 3x (a 1.5x improvement) is worth the reset. Going from 8x to 12x (also 1.5x) is worth it too. The temporary setback of losing your pickaxe and muscles is always recovered within 2–3 runs at the new multiplier level.
The exception is if you're close to unlocking a new pickaxe tier. If you need just 2 more wins for the Obsidian Pickaxe, grind those wins first and then rebirth. Losing 2 wins worth of progress to a reset when you're that close to a major upgrade isn't optimal.
Optimal Coin Spending at Every Stage
Here's a rough spending guide based on where you are in the game:
| Stage | Pickaxe Budget | Muscle Budget | Notes |
|---|---|---|---|
| Pre-Rebirth 1 | 70% | 30% | Get to Stone/Iron ASAP |
| Rebirth 1–2 | 60% | 40% | Muscles compound with multiplier |
| Rebirth 3–4 | 50% | 50% | Both equally impactful now |
| Rebirth 5+ | 40% | 60% | Pickaxe likely near-maxed, muscles catch up |
Don't Ignore Daily Challenges
+1 Dig Per Step has a daily challenge system that most new players overlook. Challenges reset every 24 hours and offer gem rewards for completing tasks like "Reach depth 300 in a single run" or "Train muscles 10 times." Gems are the premium currency, and they're used to buy cosmetic pickaxe skins, trail effects, and occasionally limited-time boosts from the gem shop.
The challenges themselves aren't hard — most of them align with what you'd be doing anyway during normal play. But the gem payouts add up. Completing 3 daily challenges per day for a week nets you roughly 150–200 gems, enough to buy a solid cosmetic skin or save toward the rare effects that cost 500+ gems.

4. All Active +1 Dig Per Step Codes (May 2026)
There are currently 3 working codes for +1 Dig Per Step as of May 8, 2026. Codes are redeemed by clicking the menu button on the left side of your screen and selecting the "Codes" tab. Type or paste the code exactly as shown — they're case-sensitive.
| Code | Reward | Status |
|---|---|---|
| DIGDEEP | Free gems | Active |
| PICKAXE | Free pickaxe upgrade | Active |
| REBIRTH1 | Rebirth token | Active |
How to Redeem Codes
- Open +1 Dig Per Step on Roblox and wait for the game to fully load.
- Click the menu button on the left side of your screen (it looks like three horizontal lines).
- Select the "Codes" tab from the menu options.
- Type or paste the code exactly as shown above into the text box.
- Click "Redeem" and check your inventory for the reward.
What Each Code Is Worth
The DIGDEEP code typically awards 25–50 gems, which is equivalent to about 2–3 days of daily challenge completions. It's a solid head start for buying your first cosmetic or saving toward a premium trail effect.
The PICKAXE code gives you a free upgrade to the next pickaxe tier. If you're currently using the Wooden Pickaxe, it bumps you to Stone. If you're on Stone, you get Iron (assuming you've met the win requirement). This code alone can save you 200–800 coins depending on timing, and more importantly, it eliminates the farming time needed to earn those coins.
The REBIRTH1 code is the most valuable of the three by a wide margin. A rebirth token lets you rebirth at any depth, bypassing the depth 500 requirement entirely. For a brand-new player, this means you can rebirth within your first 5 minutes of playing — walk a few steps, open the rebirth menu, use the token, and immediately start your second life with a 2x multiplier. Combined with the PICKAXE code, you can have a 2x multiplier and a Stone Pickaxe before you've even reached depth 50.
Redeem all three codes in this order for the best results: REBIRTH1 first (get the multiplier), then PICKAXE (upgrade your tool at the boosted level), then DIGDEEP (bank the gems for later). That sequence front-loads the progression benefits and gives you the strongest possible start.
5. How to Earn Free Robux for +1 Dig Per Step
+1 Dig Per Step's optional game passes — things like auto-walk, 2x dig speed, and the VIP trail pack — range from 75 to 399 Robux. None of them are required, but the auto-walk pass in particular is a quality-of-life improvement that turns the game into a genuine idle experience. Instead of holding your movement key constantly, your character walks automatically and you just manage upgrades between runs.
If you'd rather not spend real money, Earnaldo lets you earn free Robux by completing offers and tasks. A few completed offers can cover the cost of the auto-walk pass, which is the single most impactful purchase for an active +1 Dig Per Step player. You can see how the whole process works at earnaldo.com/how-earnaldo-works.
Beyond game passes, here are the in-game strategies for maximizing your progress without spending anything:
The Free Player's Advantage
Because +1 Dig Per Step's progression is purely stat-based (there's no trading economy or PvP), free players don't face any competitive disadvantage against pass holders. A pass holder with auto-walk digs while AFK. A free player who actively walks for the same duration digs the same amount. The pass saves effort, not progress. If you're the type who plays actively while watching YouTube or listening to music, you're getting the exact same results as someone who paid for auto-walk.
Stack Codes with Rebirth for a Mega Start
The three active codes (REBIRTH1, PICKAXE, DIGDEEP) are worth roughly the equivalent of 45–60 minutes of early-game grinding. Combined with an immediate first rebirth from the token, you can reach the same power level in 10 minutes that a code-less player reaches in an hour. That time savings compounds throughout your entire play session.
Focus on Wins Over Depth
Once you've rebirthed 2–3 times, the multiplier increases slow down and the real progression comes from unlocking higher pickaxe tiers through wins. Each win requires reaching the bottom, and the bottom gets easier to reach with every multiplier and pickaxe upgrade. Set a target of 3–5 wins per play session and you'll steadily unlock better gear without burning out on repetitive runs.
Want Free Robux for +1 Dig Per Step Passes?
Earn Robux by completing simple tasks on Earnaldo — then spend them on any game pass you want.

6. Frequently Asked Questions
Upgrade your pickaxe to at least Tier 5 (Gold Pickaxe) and train your muscles to 50+ strength. Combined, those give you roughly 33 blocks per step before rebirth multipliers. After your first rebirth (2x), that jumps to 66 blocks per step. The fastest players stack Rebirth 5 (12x), the Diamond Pickaxe (+35), and maxed muscles (+50) for over 1,000 blocks per step.
Yes. Three codes are currently active: DIGDEEP (free gems), PICKAXE (free pickaxe upgrade), and REBIRTH1 (rebirth token). Redeem them in the Codes tab of the in-game menu. Codes can expire without notice, so use them as soon as possible.
Rebirthing resets your depth, pickaxe tier, and muscle levels to zero but gives you a permanent multiplier that boosts all future digging. The first rebirth requires reaching depth 500 and gives a 2x multiplier. Each subsequent rebirth has higher requirements but better multipliers, up to 12x at Rebirth 5. The lost progress is recovered quickly thanks to the new multiplier — typically within 2–3 runs.
Completely free. Every pickaxe, every muscle level, every rebirth tier, and every depth zone is accessible without Robux. The optional game passes (auto-walk, 2x speed, VIP trails) provide convenience and cosmetics but don't unlock any exclusive content or stats. Plenty of leaderboard players are free-to-play.
25 wins. Each win is earned by reaching the bottom of the dig zone. Early runs take 30–45 minutes, but after a few rebirths and pickaxe upgrades, a single bottom run takes 3–5 minutes. Grinding from 0 to 25 wins with a good setup takes roughly 2–3 hours of total play, spread across however many sessions you want.
Gems are the premium cosmetic currency. You spend them in the gem shop on pickaxe skins, digging trail effects, and character accessories. They don't affect your dig rate or stats — they're purely visual. You earn gems from daily challenges (10–30 per challenge), codes, and milestone rewards. There's no way to buy gems with Robux; they can only be earned through gameplay.
Yes. The bottom depth varies between 1,000 and 1,200 blocks depending on the server instance. This randomization prevents players from memorizing an exact target and adds a small element of unpredictability to each run. The variation doesn't significantly affect strategy — if you can reach 1,000, you can reach 1,200 with maybe 30 seconds of extra walking.
Both, but lean toward the pickaxe in the early game. A 60/40 split favoring pickaxe upgrades until you hit Tier 4 (Steel), then shift to 50/50. Muscles become more valuable in the late game because the rebirth multiplier amplifies them the same way it amplifies pickaxe bonuses, and muscle levels have a higher ceiling (100 levels of +0.5 each) than individual pickaxe tier jumps.
+1 Dig Per Step doesn't try to be complicated, and that's exactly why it works. The one-mechanic premise — every step digs one block — is the kind of clean design that makes incremental games addictive. Whether you're chasing the Diamond Pickaxe, grinding toward Rebirth 5, or just zoning out and watching your character tunnel through glowing crystal formations, there's a satisfying loop here that rewards both active grinding and casual play. Use the codes, follow the upgrade path, and you'll be outdigging everyone in the lobby before the hour's up.
Related Guides
If you're looking for more Roblox game guides, check out these popular posts:
- Grow a Garden Free Robux Guide — farming strategies, crop tier lists, and trading tips
- Pet Simulator 99 Free Robux Guide — pet hatching, best eggs, and coin optimization
- Slime RNG Free Robux Guide — aura crafting, luck mechanics, and progression strategies