The Mimic Tier List (2026) — Scariest Monsters Ranked
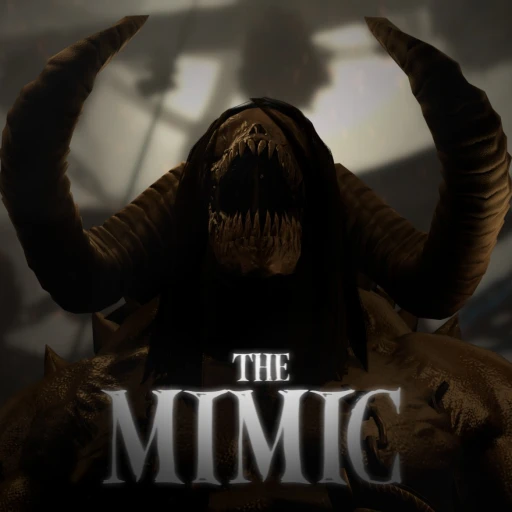
The Mimic has over 1.18 billion visits on Roblox — and a lot of those visits end with someone sprinting through a dark hallway, heart pounding, absolutely convinced they're about to lose. CTStudio built something genuinely unsettling across two complete books and 8 chapters, and not every monster is created equal.
This tier list ranks every major monster in The Mimic by three factors: how scary the encounter actually feels, how difficult the monster is to survive, and how strong its design is as a horror creation. Rankings are based on the current live game as of April 2026, ahead of the Book 3 (Rage) release.
You can find everything else about the game — active codes, free Robux tips, and game guides — on the The Mimic hub page.
Table of Contents
Quick context: The Mimic is a Roblox horror game by CTStudio, launched January 2021. It's based on Japanese folklore and yokai mythology, with 89.9% approval from roughly 4,600 daily players. Book 3 is expected April–May 2026.
S S Tier — Most Terrifying Monsters in The Mimic
These monsters define the game. Their design, their encounter design, and their place in the broader story all combine to create something genuinely memorable. They're not just scary — they're the reason people keep coming back.
Sama (Kintoru) — Beast of Control
Sama is where it all starts. Book 1, Chapter 1 — you're in a school classroom, the lights are wrong, and this tall black humanoid with a white mask and impossibly long nails is waiting. It's the first monster most players ever meet in The Mimic, and it hits hard precisely because nothing prepares you for it.
The design pulls from yokai folklore in a way that feels considered rather than generic. The white mask, the black feathers, the stillness before movement — it's a creature that communicates wrongness before it ever moves. Sama gets S tier not just because of the jump factor, but because it sets the horror vocabulary for the entire game. The 1.18 billion visit count is, in large part, built on this one encounter.
Enzukai — Beast of Jealousy
Enzukai is the final antagonist of Book 2, Chapter 4, and it earns that position. After eight chapters of buildup across two books, the Enzukai encounter is designed to be the hardest and most unsettling boss fight in the game. Players who've cleared everything else still find this one punishing.
What keeps it in S tier isn't raw difficulty alone. It's that the encounter rewards patience you've built over the entire game — then punishes the moment you get comfortable. The payoff for reaching Book 2 Chapter 4 is both narratively satisfying and genuinely frightening.
Yurei — Book 2 Chapter 3
Yurei's Forest is the most consistently terrifying location in The Mimic. The pursuit through that environment — low visibility, disorienting layout, Yurei relentlessly closing distance — is what most players point to when they describe their scariest moment in the game. The dedicated boss fight in Yurei's Arena amps the pressure further.
Yurei doesn't rely on cheap scares. The dread is structural. The forest is built to disorient, and Yurei is built to exploit that disorientation. It's horror through environment design as much as monster design.
A A Tier — Excellent Monsters
A-tier monsters don't quite reach the iconic status of the S tier, but they're genuinely excellent horror encounters. Each one does something mechanically or aesthetically that makes it stand out.
Umibozu — Book 2 Chapters 1–2
Umibozu is the vengeful spirit of a drowned priest, and it appears across the Broken Ship and the Deep Ocean. The underwater pursuit sequences are unlike anything else in the game. Water-based horror works here because it removes player control in a way land encounters don't — you're slower, your orientation is off, and Umibozu knows it.
The light-based patrol mechanics add a puzzle layer on top of the fear. Learning to move through Umibozu's patrol patterns without triggering it takes time, and the consequence for failing is immediate and harsh.
Omukade — Book 1 Chapter 3
Omukade is a giant centipede yokai in its own lair, and the scale of the thing compared to a player character creates genuine dread that few other monsters match. There's something specifically uncomfortable about the size disparity — you're not facing something human-shaped, you're facing something that couldn't care less about you except as an obstacle.
The boss encounter requires team coordination, which makes it one of the few monsters in the game that gets meaningfully harder when you're playing solo. Group communication is actually relevant here.
Biwaki — Book 1 Chapter 2
Biwaki haunts the Hotel section and it's arguably the most YouTube-friendly monster in the game — its jump scares are well-constructed, with distinct audio cues that prime you before the actual scare lands. That's harder to pull off than it sounds. A lot of horror games rely on audio silence as a scare tool; Biwaki uses audio as an active signal and still manages to catch people off guard.
It's one of the most recognized monsters from The Mimic content across streaming platforms, which speaks to how repeatable and shareable its encounters are.
B B Tier — Good Monsters
B-tier monsters are solid entries. They contribute meaningfully to their chapters without necessarily being the reason someone talks about the game. Several have strong mechanical design even if the fear factor is less immediate.
Shaku — Book 1 Chapter 2, Hospital
Shaku's patrol patterns in the Hospital section create tense hide-and-seek gameplay that rewards paying attention. Its audio cues are distinct enough that experienced players can track it by sound alone. That's good monster design — it teaches you to listen, not just to look.
Kusonoki — Book 1 Chapter 2, Imperial Palace
The thematic depth here elevates Kusonoki above a simple obstacle. Named after the historical figure Kusonoki Masashige — who originally sealed the beasts in The Mimic's lore — this monster carries weight beyond its encounter design. Understanding the lore makes the fight land differently. Check the The Mimic Wiki if you want the full story context before Chapter 2.
Ryoshi — Book 2 Chapter 2, The Tower
Ryoshi spawns every 60 seconds. That timer is the whole encounter. Players work through memory puzzles on each floor while using holes and boxes for cover — and the clock is always ticking. The mechanical pressure is more anxiety-inducing than the monster itself, but that anxiety is real.
Jikininki — Book 2 Chapter 2
Jikininki patrols The Palace and Foggy Cavern in what is already the most monster-dense chapter in the game (9 hostile monsters in Chapter 2 total). Managing Jikininki alongside the other threats in that chapter is genuinely stressful. It's not the most individually terrifying encounter, but it's consistently punishing in context.
Akihito — Book 2 Chapter 3, Uchiumi Residence
Akihito is The Father figure at the Uchiumi Residence, and it leans on psychological horror rather than jump scares. That's a harder trick to pull off in a Roblox game. The atmosphere of the residence, combined with Akihito's presence in it, makes this one of the more unsettling encounters in Book 2 — even if it's not the most mechanically demanding.
C C Tier — Average Monsters
C-tier monsters aren't failures. They serve their chapters. They're just more predictable once you know the game, and they don't leave the same impression as the monsters above them.
Shizu — Book 1 Chapter 1, Cavern near Arari Village
Shizu is an early-game monster, and it shows. The first time you encounter it, the effect works. By the second playthrough, the pattern is readable and the fear is mostly gone. Good introduction to the game's mechanics, less effective as a standalone monster.
Megumi — Book 1 Chapter 2, Library
Megumi's patrol route in the Library is predictable enough that it becomes one of the easier encounters in Chapter 2. The design is fine. The execution is just not as sophisticated as the better monsters in the same chapter.
Kaito — Book 1 Chapter 3, Sakura Swamp
Kaito contributes atmosphere more than genuine terror. The Sakura Swamp setting is visually strong, but Kaito itself doesn't add much mechanical tension to the location. It's there, it's functional, it's not memorable.
Nagisa — Book 2 Chapters 1–2, the Ship
Nagisa's chasing sequences on the Ship are fast — fast enough to feel threatening. But the encounters are telegraphed enough that experienced players can anticipate them reliably. Worth watching on a first run; less interesting on returns.
Tier List Summary Table
| Monster | Tier | Book / Chapter | Location | Difficulty |
|---|---|---|---|---|
| Sama (Kintoru) | S | Book 1, Ch. 1 | School Classroom | High |
| Enzukai | S | Book 2, Ch. 4 | Final Boss Arena | Very High |
| Yurei | S | Book 2, Ch. 3 | Yurei's Forest / Arena | Very High |
| Umibozu | A | Book 2, Ch. 1–2 | Broken Ship / Deep Ocean | High |
| Omukade | A | Book 1, Ch. 3 | Omukade's Lair | High |
| Biwaki | A | Book 1, Ch. 2 | Hotel | Medium |
| Shaku | B | Book 1, Ch. 2 | Hospital | Medium |
| Kusonoki | B | Book 1, Ch. 2 | Imperial Palace | Medium |
| Ryoshi | B | Book 2, Ch. 2 | The Tower | Medium-High |
| Jikininki | B | Book 2, Ch. 2 | The Palace / Foggy Cavern | Medium |
| Akihito | B | Book 2, Ch. 3 | Uchiumi Residence | Medium |
| Shizu | C | Book 1, Ch. 1 | Cavern / Arari Village | Low |
| Megumi | C | Book 1, Ch. 2 | Library | Low |
| Kaito | C | Book 1, Ch. 3 | Sakura Swamp | Low-Medium |
| Nagisa | C | Book 2, Ch. 1–2 | The Ship | Low-Medium |
How We Ranked These Monsters
Three factors determined every placement on this list. First: raw scare factor — how frightening the encounter feels on first contact, and whether it holds up on repeat runs. Second: mechanical difficulty — how hard the monster actually is to survive, including patrol behavior, speed, and boss fight design. Third: design quality — how well the monster's appearance, audio, and folklore roots combine into a coherent horror concept.
Monsters that score high on all three factors end up in S. Monsters that nail one or two factors, but not all three, land in A or B. C-tier monsters work fine within their chapters, but they don't stay with you after the run ends.
One thing this list doesn't penalize: chapter placement. A monster that appears early isn't automatically lower tier just because it has to be approachable for new players. Sama is S tier precisely because it's the first monster and it still delivers. Early placement is an excuse a lot of games use for weak design — The Mimic mostly doesn't fall into that trap.
It's also worth noting that Nightmare Mode — where you have one life and no respawn — changes how every monster on this list feels. Ryoshi, which is B-tier in standard mode, becomes genuinely punishing on Nightmare because the 60-second spawn timer and the memory puzzle pressure combine with zero room for error. If you're playing Nightmare Mode, treat every B-tier monster as A-tier in terms of caution required.
For the full game experience, you can find The Mimic directly on Roblox. For deeper lore on each monster and their folklore origins, the community-maintained The Mimic Wiki is excellent. For active codes before you start a run, the The Mimic codes page keeps a current list. And if you're comparing The Mimic to other horror experiences, the Doors and Piggy pages are worth a look — both games have strong monster rosters worth measuring against this one.

What's Coming in Book 3
Book 3 (Rage) is expected April to May 2026. The central monster is Netamo, the Beast of Rage — described by CTStudio as the most violent and powerful of all four beasts. That's a direct claim on S-tier placement, and based on the trajectory of the game's difficulty across Books 1 and 2, it's probably not marketing noise.
Book 3 also introduces mechanical changes that will affect how every monster plays. Monsters won't instantly kill on contact anymore — each one gets unique abilities instead. That's a significant shift from the current design, and it might reshuffle some of these tier placements once Book 3 is live. Nightmare Mode remains brutal: one life, no respawn, though resurrection statues can be activated with in-game coins if you've saved enough.
This list will update when Book 3 drops and Netamo is fully assessable in practice rather than on paper.
Earn Free Robux While You Play
Want more Robux for The Mimic and other Roblox games? Earnaldo lets you earn free Robux by completing simple tasks — no surveys, no downloads, just real rewards.

Frequently Asked Questions
Who is the scariest monster in The Mimic?
Sama (Kintoru) from Book 1 Chapter 1 is the most iconic — it's the first monster players encounter and it holds up across replays. Yurei in Book 2 Chapter 3 offers arguably the most relentless and sustained fear in the game, with the forest pursuit sequence being the one encounter players most often describe as genuinely terrifying rather than just startling.
Which chapter has the most monsters in The Mimic?
Book 2 Chapter 2 is the most monster-dense chapter in the game, with 9 hostile monsters across The Tower, The Palace, and the Foggy Cavern. It's the chapter that most rewards knowing patrol patterns cold before you attempt it.
What is Nightmare Mode in The Mimic?
Nightmare Mode gives you one life with no automatic respawn. If a monster kills you, the run ends. Resurrection statues exist throughout the game and can bring you back — but they cost in-game coins, so managing your currency matters as much as avoiding monsters. It's a fundamentally different experience from standard mode.
When is The Mimic Book 3 releasing?
Book 3 (Rage) is expected to release April to May 2026. It introduces Netamo, the Beast of Rage, along with new combat mechanics where monsters won't instantly kill on contact and each monster gets unique abilities instead of a shared kill system.
How many visits does The Mimic have on Roblox?
As of April 2026, The Mimic has surpassed 1.18 billion total visits with around 4,600 concurrent players daily and an 89.9% approval rating. CTStudio launched the game in January 2021.
Is the tier list the same for solo and group play?
Not exactly. Omukade in Book 1 Chapter 3 is harder solo because the boss fight specifically rewards team coordination. Ryoshi in Book 2 Chapter 2 is equally brutal regardless of party size — the 60-second spawn timer doesn't care how many players are in the server. Most rankings on this list assume standard group play; solo runs generally push B-tier encounters up in difficulty.
The Mimic remains one of the strongest horror experiences available on Roblox — and with Book 3 on the way, the monster roster is about to get its most significant expansion since launch. If you're coming back for Netamo, use the time now to clear Book 2 on Nightmare Mode. It's the best preparation available, and it puts every monster on this list in a different light.