Last updated: June 10, 2026
Dead Rails Tier List (2026) — Best Classes Ranked
Dead Rails has become one of Roblox's standout survival games, dropping players onto a zombie-infested train where every class choice matters. With 24 playable classes in the current roster, picking the right one can mean the difference between a successful run and a quick death. This tier list ranks every class from S tier down to C tier based on loadout strength, passive abilities, and overall impact on survival. For more guides and updates, visit our Dead Rails hub page.
We've evaluated these classes across hundreds of rounds, testing them in solo play, duo runs, and full lobbies. Our rankings weigh combat effectiveness, survivability, team utility, and how quickly each class can contribute after spawning. A class that hits the ground running with a strong loadout and useful passives will always rank higher than one that needs time or luck to become relevant.
Table of Contents
S Tier — Best Classes in Dead Rails
These 5 classes are the strongest picks in Dead Rails right now. They bring dominant loadouts, game-changing passive abilities, or both. If you're trying to maximize your chances of surviving a run, you want to be playing one of these.
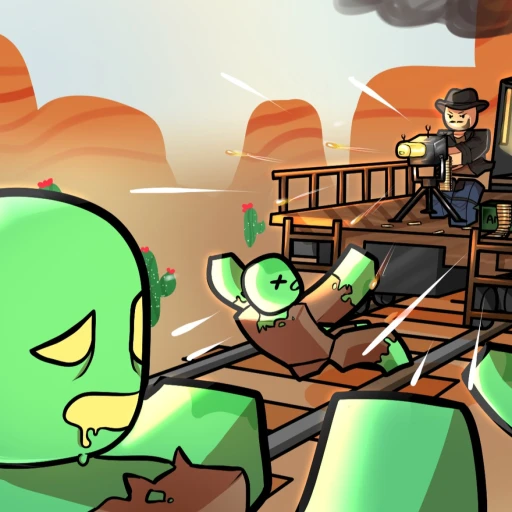
Cowboy
Cowboy is the best overall class in Dead Rails and the safest pick for any situation. He spawns with a Revolver, 2 ammo packs, and a tamed Horse — giving you immediate ranged combat capability and the fastest mobility option in the game right from the start. No other class offers that combination of firepower and speed at spawn.
The Revolver lets you deal with threats at range before they become a problem, and the Horse means you can reposition faster than any class without a mount. In a game where getting swarmed is the primary way players die, Cowboy's ability to kite enemies while dealing consistent damage makes him the most reliable class across all skill levels. He doesn't need a specific strategy or team composition to perform well — he just works.
Eggslinger
Eggslinger is the undisputed META class for team play. Every 2 minutes, Eggslinger spawns an Egg that hatches into a friendly unit — these can be Zombies, Wolves, Werewolves, or Outlaws. The cap sits at 20 living allies at once, and Eggslinger starts with 1 Egg already in hand. That's a personal army that grows larger with every passing minute.
The sheer volume of bodies Eggslinger puts on the field changes how the entire game plays out. Enemies get overwhelmed by friendly units, giving you and your teammates breathing room to loot, fortify, and plan. In longer runs, Eggslinger's value compounds as the ally count climbs toward that 20-unit cap. No other class provides this level of sustained pressure. If your lobby has an Eggslinger, everyone's survival odds go up dramatically.
Arsonist
Arsonist is the crowd control specialist of Dead Rails. The class spawns with 4 Molotovs, is completely immune to fire damage, and deals 2x fire damage to enemies. That's a loadout built for clearing groups of zombies quickly and safely, which is exactly what you need during swarm events.
Fire immunity is more valuable than it might seem at first. It means Arsonist can throw Molotovs at close range without any self-damage risk, stand in burning areas to block choke points, and generally control space in ways no other class can. The 4 starting Molotovs provide enough ammunition for multiple engagements before you need to resupply. In tight corridors on the train, a well-placed Molotov from Arsonist can single-handedly stop a wave.
Vampire
Vampire is the best solo class in Dead Rails, and it's not even close. The speed and melee damage boosts make Vampire a relentless close-range fighter, and the life-steal ability means every kill restores health. That self-sustaining loop lets Vampire stay in fights indefinitely without relying on medical supplies or teammates.
For players who prefer running solo or can't count on their team for support, Vampire removes the biggest problem in Dead Rails — health management. Other classes need to find healing items or rely on a Doctor. Vampire just keeps fighting and keeps healing. The aggressive playstyle isn't for everyone, but in the hands of a player who can land melee hits consistently, Vampire is nearly unkillable.
Werewolf
Werewolf rounds out S tier with one of the most dramatic power spikes in the game. During nighttime phases, Werewolf receives massive increases to speed, damage, and health. The transformation turns an average class into a freight train of destruction that can tear through enemy waves that would overwhelm other classes.
The trade-off is obvious — during daytime, Werewolf doesn't have the same impact. But Dead Rails' day-night cycle means you'll spend a significant portion of each run in nighttime conditions, and the nighttime power spike is so extreme that it more than compensates for the slower daytime phases. Smart Werewolf players conserve resources during the day and become the team's primary damage dealer once the sun goes down.
A Tier — Excellent Classes
A-tier classes are strong picks that excel in specific roles. They don't quite match the raw power or versatility of S-tier classes, but a skilled player on any of these can carry a run. These are the classes you pick when S-tier options are taken or when you need to fill a specific gap in your team.
Doctor
Doctor is the best support class in Dead Rails. The ability to revive teammates without needing items is genuinely unique — every other class needs specific consumables to bring someone back. Doctor just does it. On top of that, Doctor starts with medical supplies, making the class an immediate source of healing for the entire team.
In full lobbies, having a Doctor dramatically increases the team's margin for error. One bad engagement that downs a teammate isn't a death sentence when the Doctor can revive them on the spot. The class doesn't bring much offensive power, which is why it sits in A tier instead of S, but the support value is unmatched.
Priest
Priest spawns with one of the most loaded starting kits in the game: 2 Crucifixes, a Shovel, and 2 Holy Waters. That's both melee and utility items ready to go from the first second. The lightning strike immunity is a nice bonus that removes one of the game's random death mechanics entirely.
Holy Water is particularly valuable because it deals area damage to undead enemies, giving Priest a ranged option that complements the Shovel's melee capability. The Crucifixes provide additional defensive utility. Priest doesn't specialize in any single area as heavily as S-tier classes, but the well-rounded loadout means you're prepared for almost anything right at spawn.
Hunter
Hunter starts with bear traps, a shovel, a crossbow, and arrows — a diverse loadout that covers area denial, melee, and ranged combat. The crossbow provides silent ranged attacks, and bear traps let you control chokepoints on the train. There's an interesting twist though: all wild wolves become werewolves when Hunter is in the game.
That wolf-to-werewolf conversion is a double-edged sword. Werewolves are tougher enemies, but they also drop better loot and create a more challenging (and rewarding) experience. Hunter players who can leverage the crossbow effectively and place traps in smart positions will find this class punches well above its weight.
President
President has one of the most unique passives in Dead Rails. When President dies, the class leaves behind a powerful soldier that continues fighting on the team's behalf. It's a death insurance policy that turns your worst-case scenario into a net positive for the squad.
The soldier spawn is strong enough to hold its own against mid-game threats, which means even a President who goes down early still contributes to the team's success. The class doesn't bring as much to the table while alive compared to S-tier options, but the death passive alone makes President a valuable team pick, especially in harder runs where casualties are expected.
Packmaster
Packmaster tames any attacking wolf without needing a Corpse item, and spawns with 3 tamed wolves already at the ready. That's an instant combat squad that fights alongside you from the moment the round begins. The wolves act as both damage dealers and damage sponges, absorbing hits that would otherwise target you or your teammates.
The automatic wolf-taming passive means Packmaster's army can grow throughout a run without spending any resources. Every wolf encounter becomes a recruitment opportunity rather than a threat. The class scales well into longer games, though it doesn't reach the same army size that Eggslinger can achieve with 20 units.
Corrosioner
Corrosioner is immune to acid damage and spawns with an Acid Barrel and Acid Mine. The acid immunity is the real selling point — during Acid Rain events, most classes are forced to take cover while Corrosioner can move freely, looting and completing objectives uncontested.
The Acid Mine and Acid Barrel provide strong area-denial tools for defending positions on the train. Corrosioner's value fluctuates depending on whether Acid Rain events occur during your run, which is why the class sits in A tier rather than S. When the weather cooperates, Corrosioner is borderline overpowered. When it doesn't, you're left with solid but not spectacular tools.
B Tier — Good Classes
B-tier classes fill useful roles and can contribute meaningfully to a team, but they're outperformed by higher-tier alternatives in most situations. These classes shine in specific scenarios or team compositions rather than being universally strong picks.
Milkman
Milkman has one of the strangest mechanics in Dead Rails — all stats scale with milk coverage. The more milk covering your character, the higher your health regen, speed, and melee damage climb. When fully covered, Milkman's stats are genuinely competitive with A-tier classes.
The problem is maintaining that milk coverage. You need consistent access to milk to keep your stats buffed, and if you lose coverage mid-fight, your effectiveness drops noticeably. It's a high-maintenance playstyle that rewards dedication but punishes downtime. Milkman is strong when the mechanic is flowing, but inconsistent compared to classes that perform well without any setup.
Conductor
Conductor drives the train faster and starts with 2 coal. In a game that takes place on a moving train, controlling the speed of that train has real strategic value. Faster travel means less time exposed to threats during transit, and the starting coal gives you fuel to work with immediately.
Conductor's value is highest in team play where the faster train speed benefits everyone. Solo, the class doesn't bring enough combat tools to compete with higher tiers. But in a coordinated team, having a Conductor manage train speed while combat classes handle threats is a solid division of labor.
Knight
Knight comes equipped with a sword and has a passive that automatically assists and protects the King class. The sword is a capable melee weapon, and the protection passive makes Knight an excellent bodyguard in lobbies where someone is running King.
The dependency on having a King in the lobby is what keeps Knight in B tier. Without a King, you're just a melee class with a sword — functional, but not exceptional. With a King, Knight becomes a focused protector that fills a clear role. The class is composition-dependent in a way that higher-tier picks aren't.
Alamo
Alamo is the best defensive class in Dead Rails. It starts with materials to fortify the train, letting you build barricades and reinforcements that protect the entire team. In a game where the train is your home base, being able to strengthen it directly is valuable.
The defensive playstyle works best in longer runs where fortifications have time to pay off. In shorter games or aggressive lobbies that push forward quickly, Alamo's building materials don't see their full value. The class rewards patience and planning, which makes it strong in the right hands but less impactful in fast-paced rounds.
Tycoon
Tycoon helps the team generate more money throughout a run. The economic advantage compounds over time, making Tycoon a strong late-game class that enables better equipment and resources for everyone. More money means more ammo, more supplies, and more options.
The downside is that Tycoon's combat capabilities are average at best. You're trading immediate fighting power for long-term economic growth, which is a bet that only pays off if your team survives long enough to spend the extra income. In experienced squads, Tycoon's value is clear. In random lobbies where runs end early, it's a gamble.
Survivalist
Survivalist deals massive damage when at low health. It's a high-risk, high-reward mechanic that turns near-death situations into damage spikes capable of clearing threats that would otherwise overwhelm you. The closer you are to dying, the harder you hit.
Playing Survivalist well means deliberately staying at low health, which is inherently risky. One extra hit and you're down. The class rewards skilled players who can manage their health precisely, but punishes anyone who misjudges the danger. It's a feast-or-famine playstyle that's thrilling when it works but frustrating when it doesn't.
C Tier — Average Classes
C-tier classes aren't unplayable, but they're outclassed by the rest of the roster in meaningful ways. Their drawbacks outweigh their strengths in most scenarios, and you'll typically get better results by switching to a higher-tier option.
Zombie
Zombie suffers from imperfect stats across the board and is expensive to unlock. The cost-to-performance ratio is the worst in Dead Rails — you're spending significant resources to access a class that doesn't compete with options available at lower price points. The thematic appeal is there, but the gameplay doesn't back it up.
Zombie's abilities are serviceable but never exceptional. Nothing in the kit provides a clear advantage over what other classes bring to the table. If you've already unlocked every other class and want variety, Zombie is fine. But if you're budgeting your unlocks, there are better investments at every price tier.
Ironclad
Ironclad trades speed for armor, and in Dead Rails, that's a bad deal. The speed reduction hurts survival significantly because you can't outrun threats, reposition during fights, or escape when things go wrong. Armor helps you absorb hits, but taking hits you could have avoided entirely is always worse than dodging them.
In a game built around mobility and quick reactions on a moving train, Ironclad's design philosophy works against the core mechanics. The extra durability occasionally saves you from a hit that would down another class, but the speed penalty puts you in danger far more often than the armor saves you. Every other class in the game can simply outrun the problems that Ironclad has to tank through.
The remaining classes in Dead Rails fall somewhere between these extremes, with performance depending heavily on individual skill, team composition, and run conditions. As the developers continue updating the game, balance changes could easily shift classes between tiers. Keep an eye on the official Dead Rails Roblox page for patch notes and updates.
Tier List Summary Table
Here's the complete Dead Rails class ranking at a glance. We've included each class's standout feature and primary role so you can quickly compare options and build the right team.
| Class | Tier | Key Feature | Role |
|---|---|---|---|
| Cowboy | S | Revolver + Horse at spawn | Ranged DPS / Mobility |
| Eggslinger | S | 20 allied units max | Army Builder / META |
| Arsonist | S | 4 Molotovs, fire immune | Crowd Control |
| Vampire | S | Life-steal on kills | Solo / Melee DPS |
| Werewolf | S | Nighttime power spike | Burst DPS / Tank |
| Doctor | A | Revive without items | Support / Healer |
| Priest | A | Crucifixes + Holy Water | Utility / Anti-Undead |
| Hunter | A | Crossbow + bear traps | Area Denial / Ranged |
| President | A | Soldier spawns on death | Death Insurance |
| Packmaster | A | 3 tamed wolves at spawn | Summoner / Fighter |
| Corrosioner | A | Acid immune + Acid Mine | Weather Specialist |
| Milkman | B | Scaling stats via milk | Scaling Brawler |
| Conductor | B | Faster train + 2 coal | Team Mobility |
| Knight | B | Sword + King protection | Melee / Bodyguard |
| Alamo | B | Train fortification materials | Defense / Builder |
| Tycoon | B | Increased money generation | Economy / Late Game |
| Survivalist | B | Low-HP damage boost | Risk-Reward DPS |
| Zombie | C | Imperfect stats | Niche / Thematic |
| Ironclad | C | Armor at cost of speed | Slow Tank |
How We Ranked These Classes
Ranking classes in a survival game like Dead Rails requires evaluating multiple dimensions of performance. We scored each class across 6 categories: spawn loadout strength, passive ability impact, solo viability, team contribution, scalability into late-game, and consistency across different run conditions. A class needed to score well in at least 4 categories to reach S tier.
Spawn loadout received heavy weighting because Dead Rails is a game where the first 2 minutes often determine the outcome. Classes that hit the ground running with weapons, mobility, or allies have a fundamental advantage over classes that need time to ramp up. That's why Cowboy and Eggslinger sit at the top — they're immediately dangerous the moment the round starts.
We also considered how each class performs across different team sizes. A class like Doctor is transformative in a 4-player lobby but less valuable solo. Vampire is the opposite — dominant solo but less critical when teammates can cover healing. The most versatile classes, the ones that perform well regardless of team size, earned a ranking boost.
Game updates and balance patches will shift these rankings over time. The Dead Rails developers actively adjust class balance, and a single buff or nerf can move a class between tiers. We'll update this list as major patches land. For broader comparisons between Dead Rails and similar games, check out our Dead Rails vs Forsaken breakdown.
Earn Free Robux While You Play
Want more Robux for Dead Rails and other Roblox games? Earnaldo lets you earn free Robux by completing simple tasks — no surveys, no downloads, just real rewards.
Frequently Asked Questions
Cowboy is the best overall class as of May 2026. He spawns with a Revolver, 2 ammo packs, and a tamed Horse, giving him immediate ranged combat and mobility that no other class matches right from the start. Eggslinger is a close second due to the overwhelming army it can generate over time.
Dead Rails currently has 24 playable classes as of May 2026. Each class has a unique loadout, passive abilities, and playstyle that affects how you approach combat, defense, and survival on the train. The roster continues to grow with game updates.
Eggslinger is widely considered the most powerful class for team play. It spawns Eggs every 2 minutes that hatch into friendly Zombies, Wolves, Werewolves, or Outlaws, with a cap of 20 living allies at once. That kind of army generation is unmatched and can overwhelm most threats in the game.
Vampire is the best solo class in Dead Rails. The speed and melee damage boosts let you engage enemies aggressively, and the life-steal ability means you can sustain yourself without relying on teammates or medical supplies. For solo runs, Vampire's self-sufficiency is unmatched by any other class.
Werewolf is an S-tier class that becomes incredibly powerful at night. During nighttime phases, Werewolf receives massive boosts to speed, damage, and health. The trade-off is reduced effectiveness during the day, but the nighttime power spike is so significant that Werewolf ranks among the top 5 classes in the game.
Zombie and Ironclad are currently the weakest classes. Zombie has imperfect stats and is expensive to unlock, making the investment hard to justify. Ironclad reduces your speed significantly, which hurts survival more than the extra armor compensates for. Both are outperformed by nearly every other class in the 24-class roster.
That covers the full Dead Rails class tier list for 2026. Whether you're running Cowboy for reliable dominance or experimenting with niche picks like Milkman, knowing where each class stands helps you make smarter choices before the round starts. Bookmark this page and check back after major updates — we'll have fresh rankings ready. For more Dead Rails content, visit our hub page, grab the latest active codes, or read our free Robux guide to unlock classes faster.